Connect Google Analytics to the website
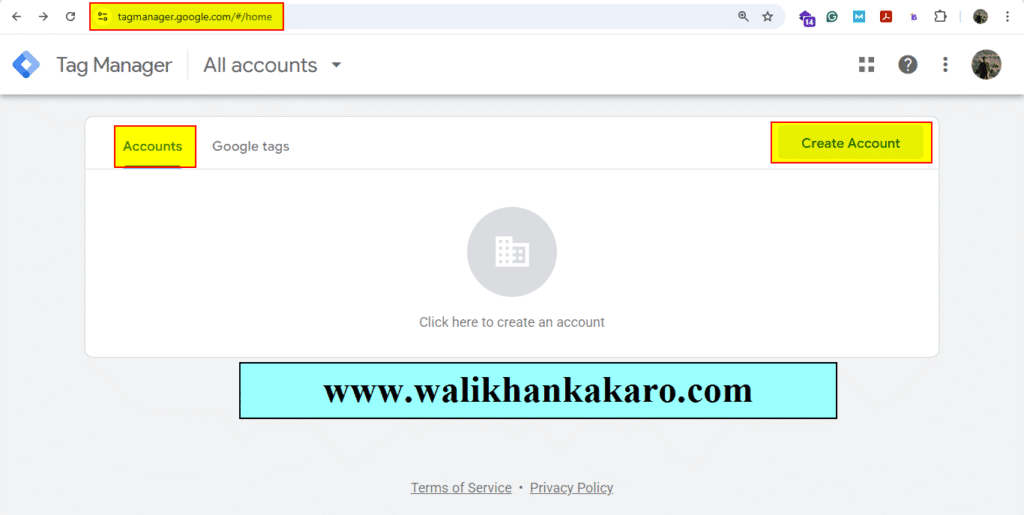
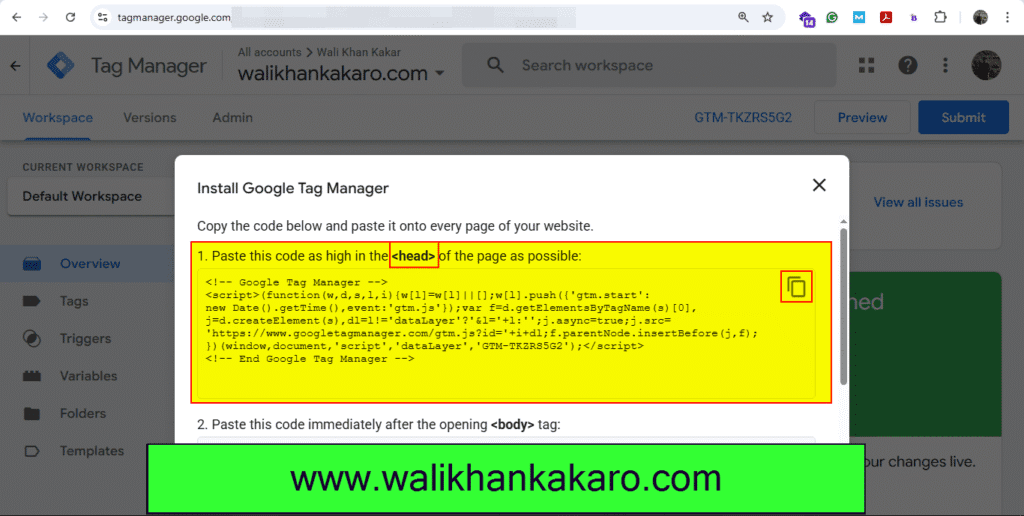
1: Go to the Google Tag Manager.
Website: https://tagmanager.google.com/
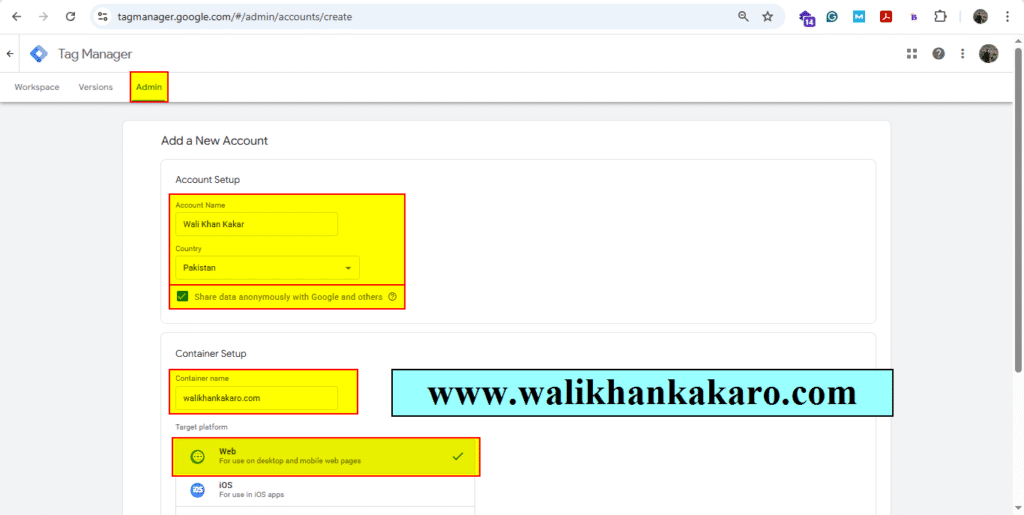
2: Create a new account.
3: Add your name and website address.
4: Copy the Head code.
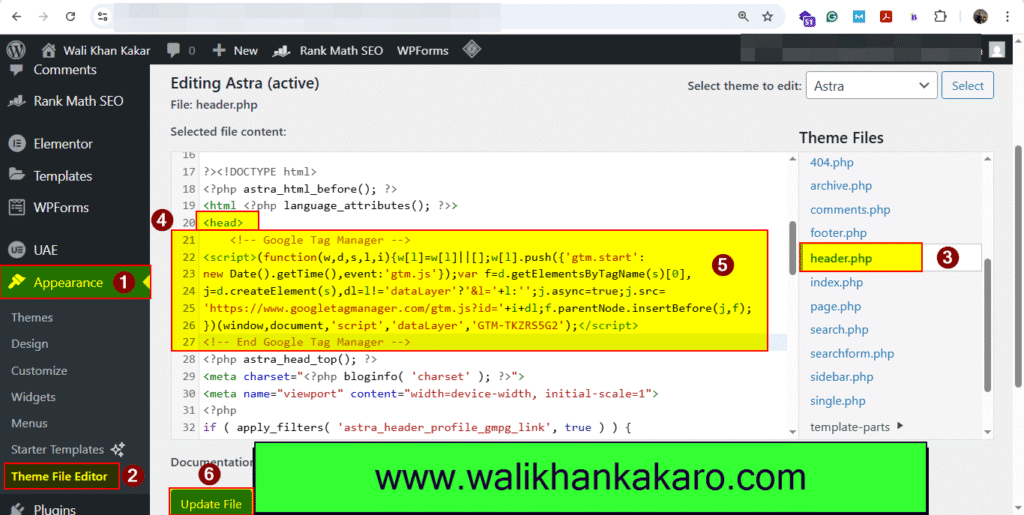
5: Go to the Appearance, then open the Theme File Editor in WordPress.
6: Open the header.php in the Theme File Editor.
7: Paste the Head code into the head section.
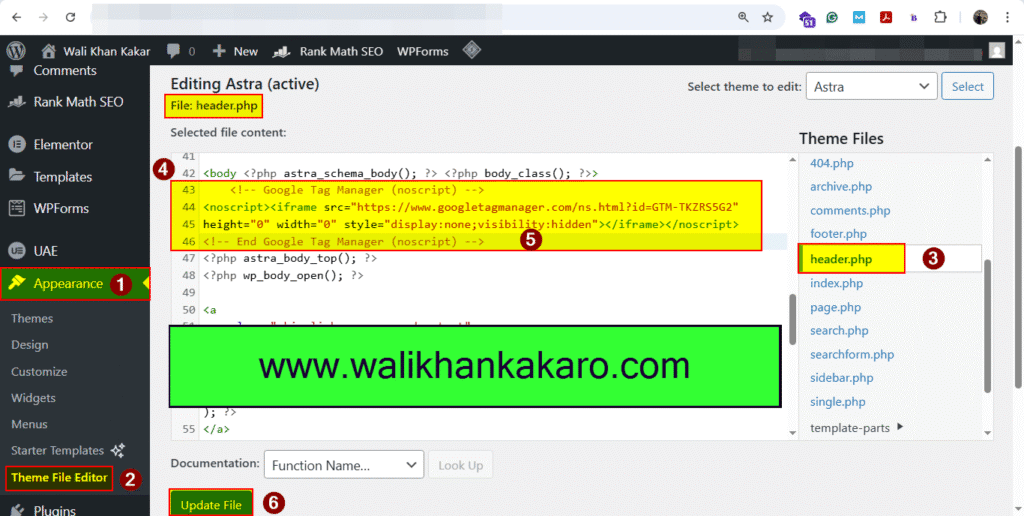
8: Copy the body code.

9: Scroll down the theme and paste the body code.
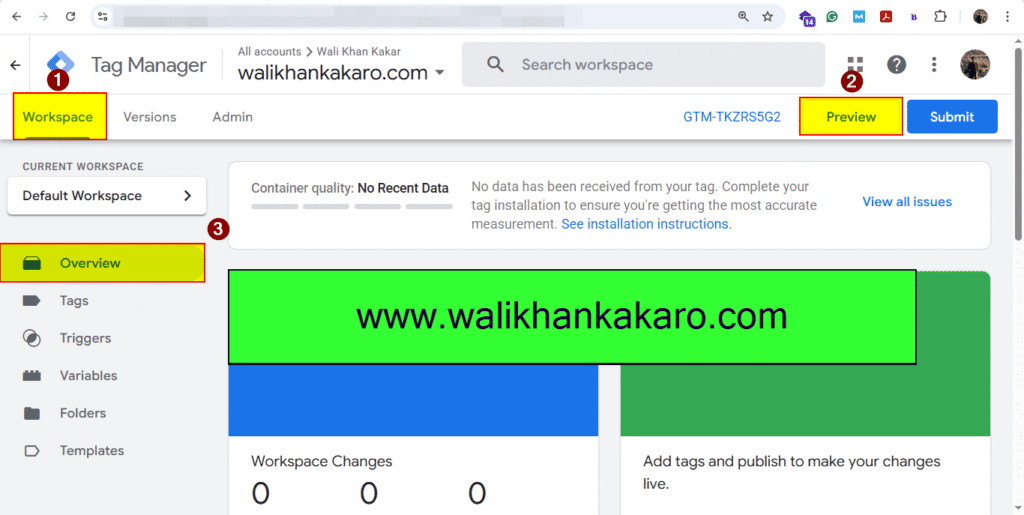
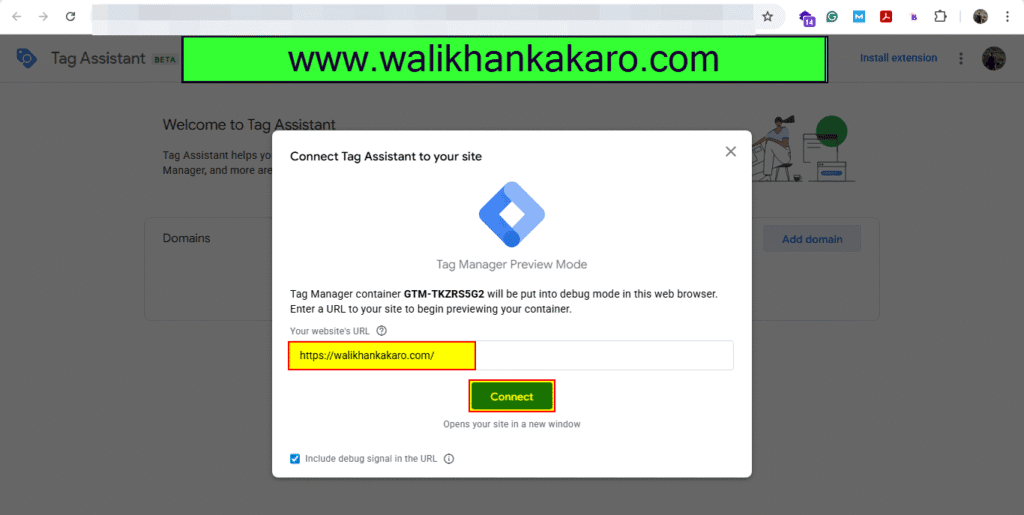
10: Click on the Preview.
11: Connect Tag Assistance to your site.
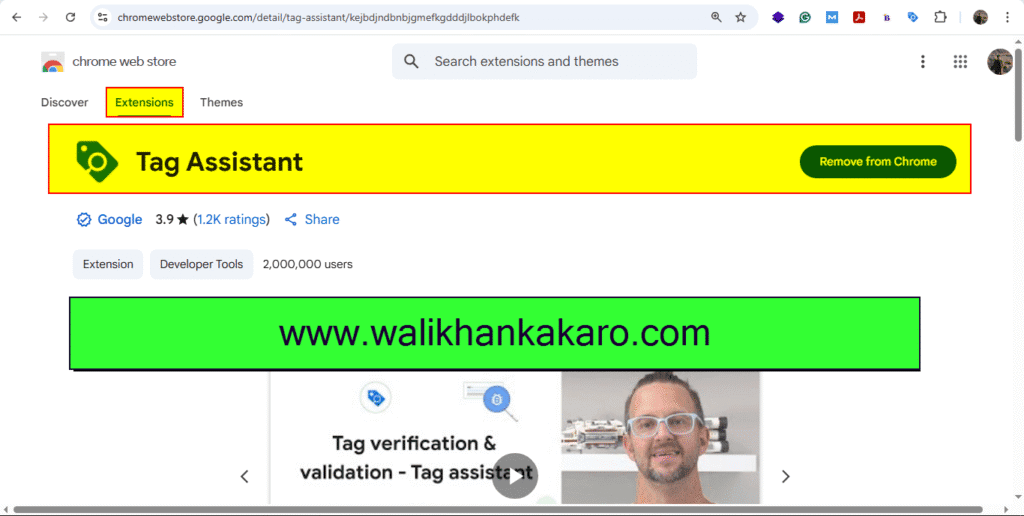
12: Connect it.
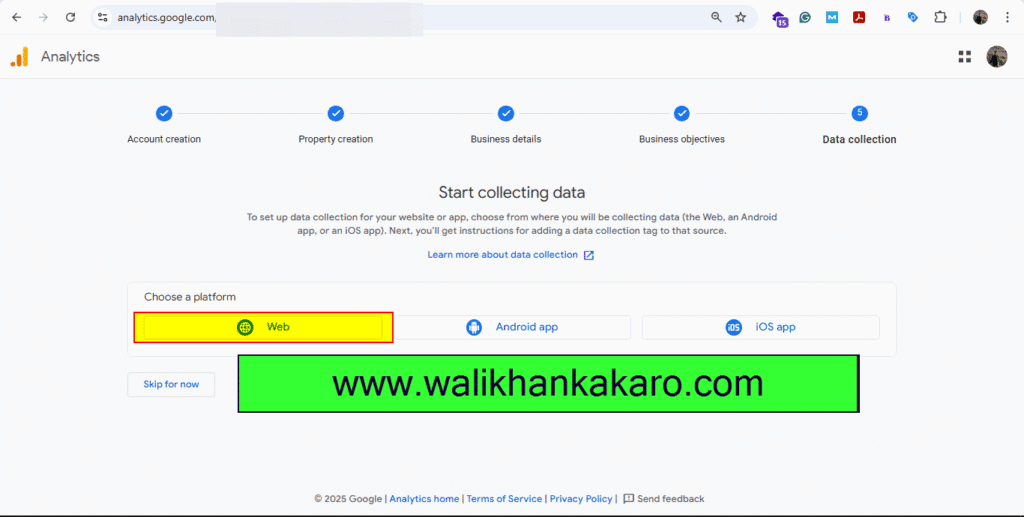
13: Install the Tag Assistance extension from Chrome.
14: Go to the Google Analytics account.
Website: https://developers.google.com/analytics

15: Create your Google Analytics account.
16: Click on the Web.
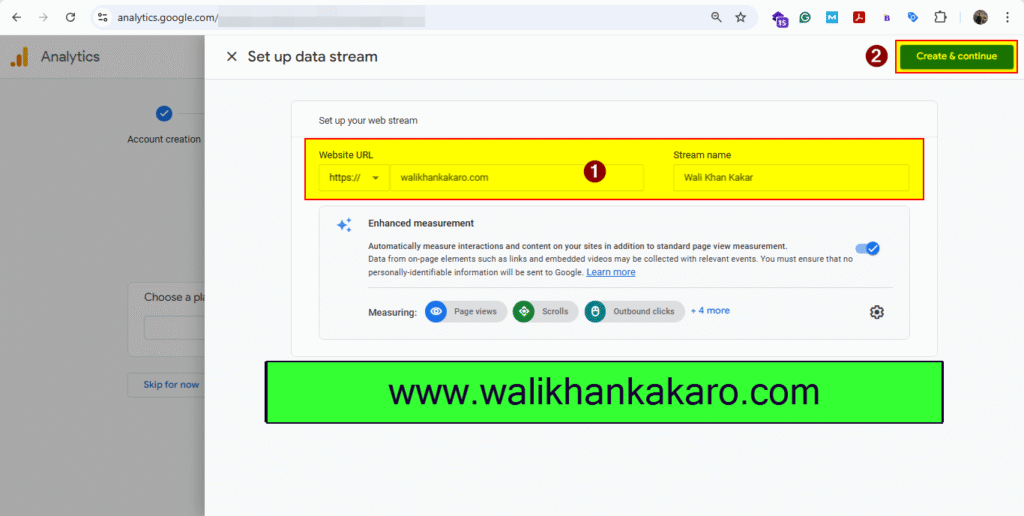
17: Add your website to Google Analytics.
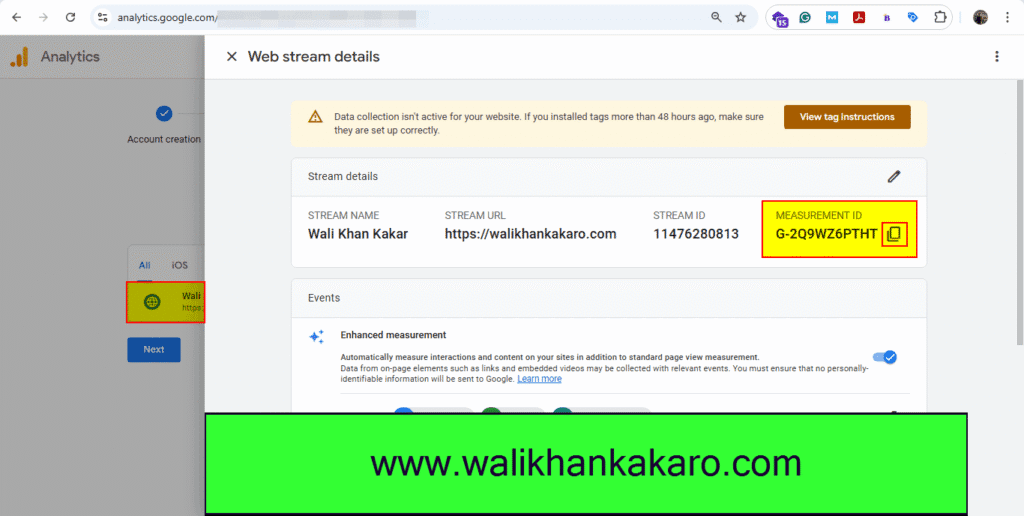
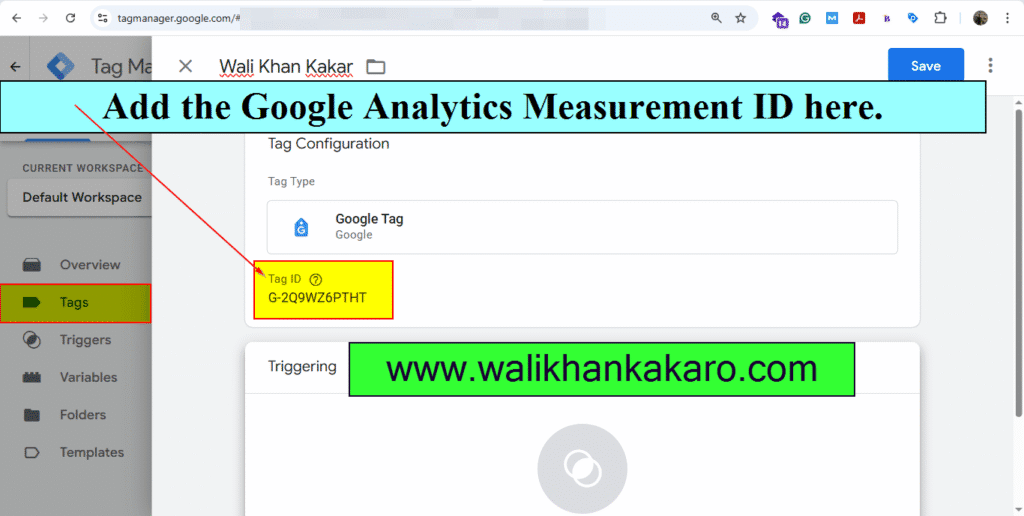
18: Copy the Measurement ID from Google Analytics.
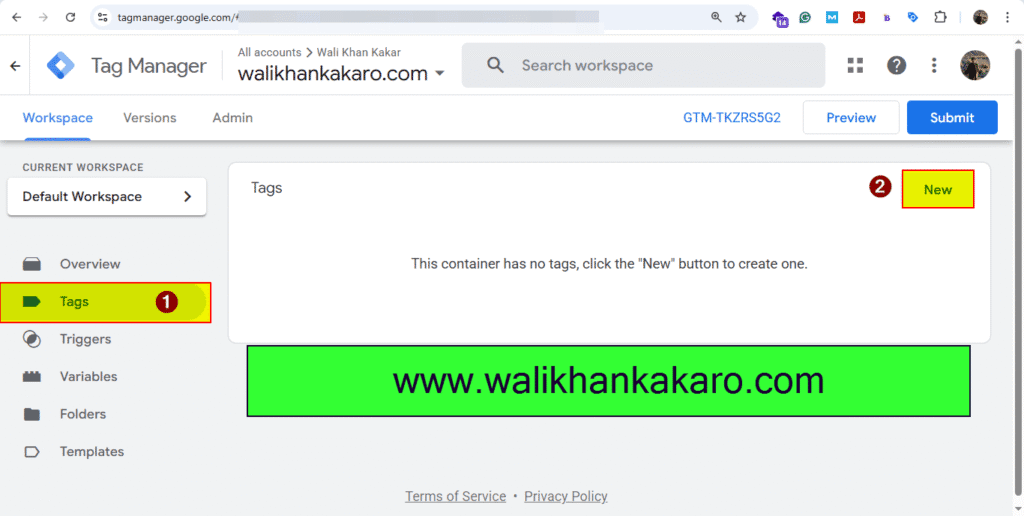
19: Go to the Google Tag Manager.
20: Click on the Tags.
21: Click on the New.
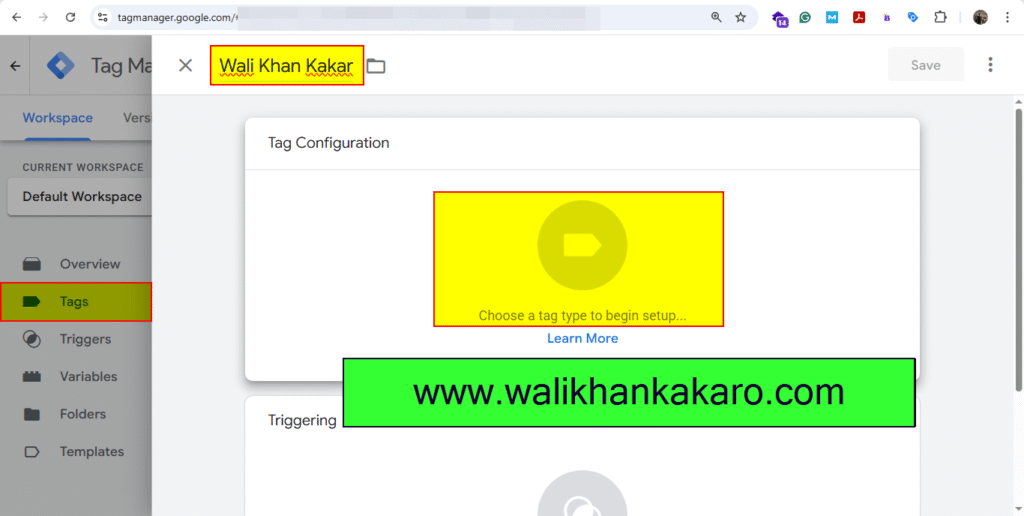
22: Choose a tag type to begin setup.
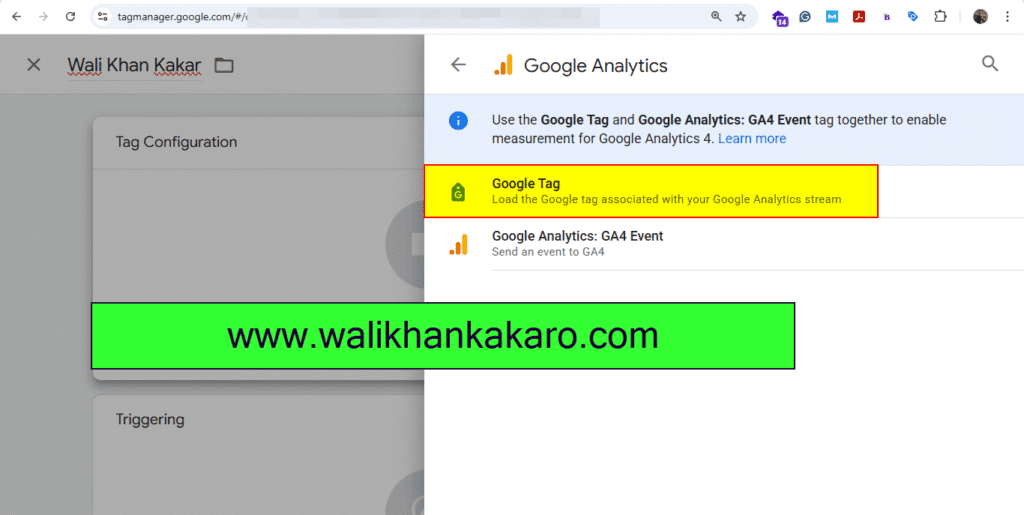
23: Go to Google Analytics.
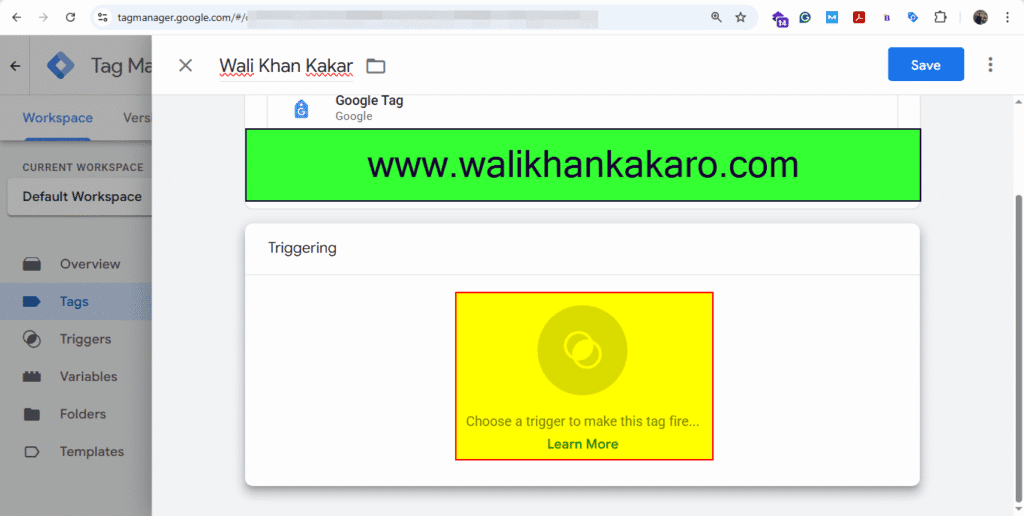
24: Open the Google Tag.
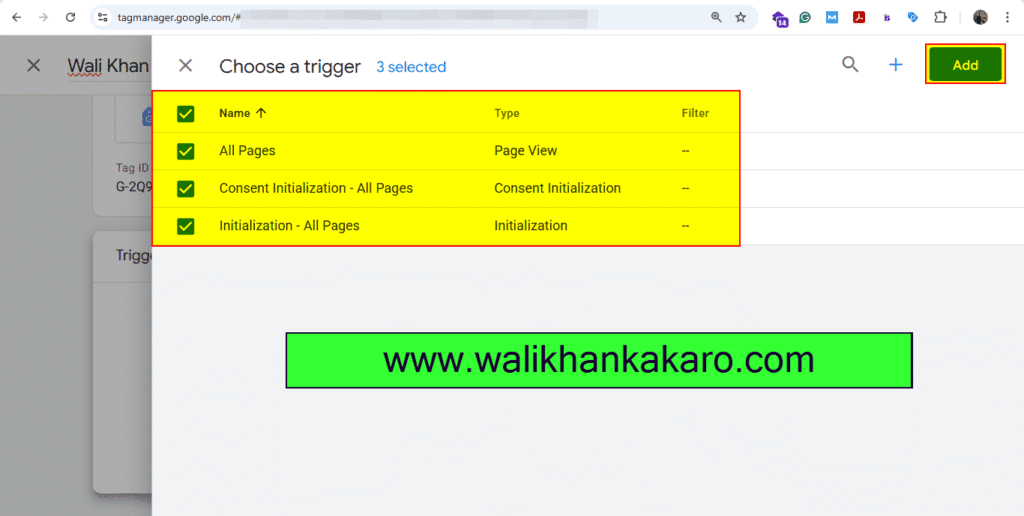
25: Add the Measurement ID here.
26: Choose a trigger to make this tag fire…
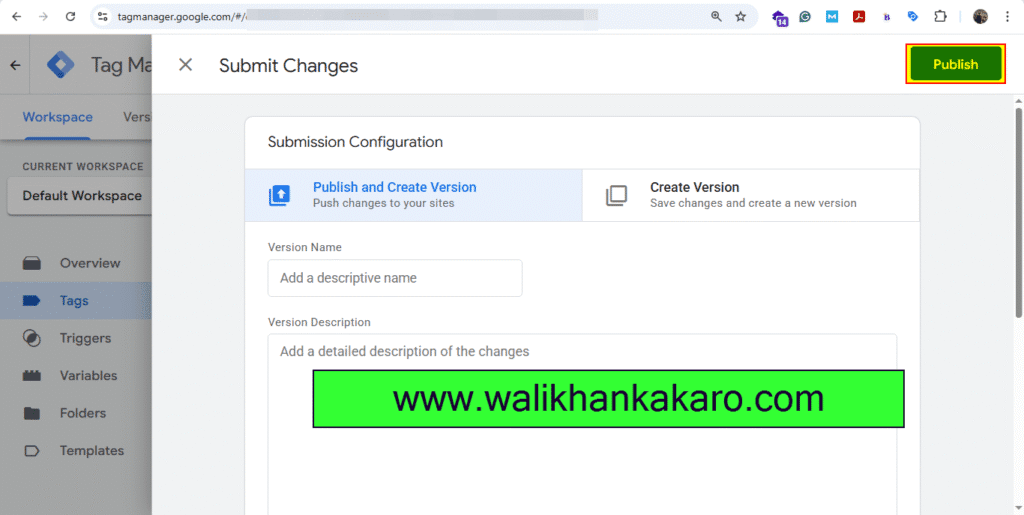
27: Add all the pages.
28: Save the settings.
29: Submit and then click on Publish.
30: Continue the Container Version Description.
31: Now go to Google Analytics.
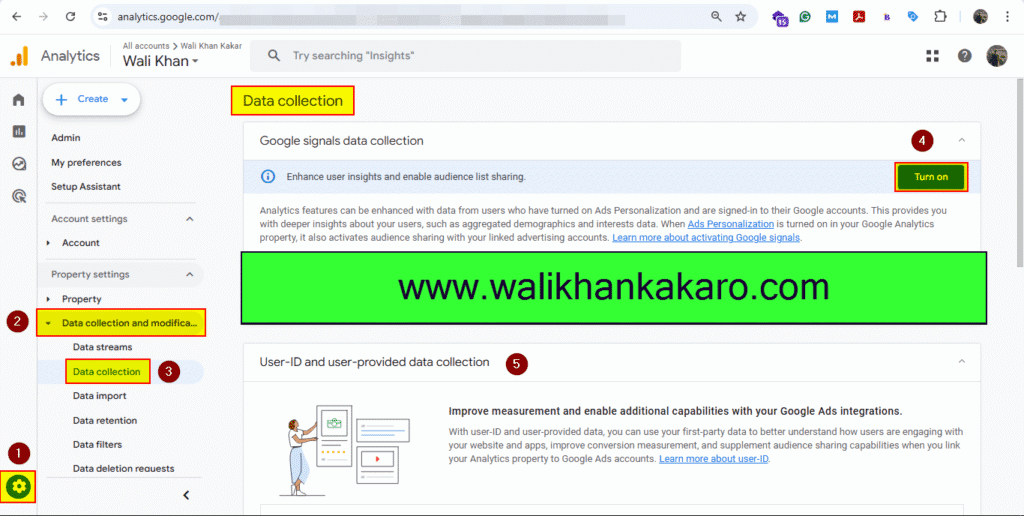
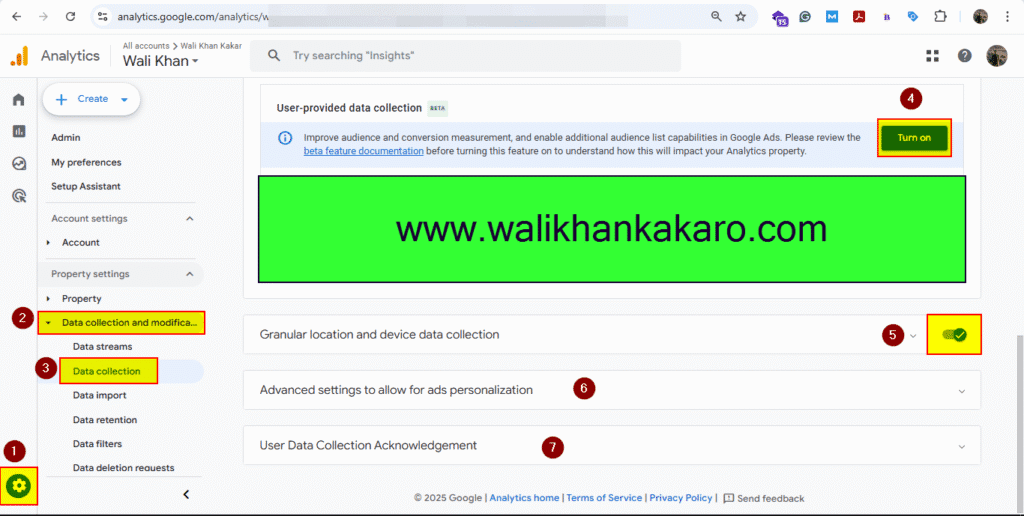
32: Go to the Admin, then go to the Data collection and modification.
32: Go to the Data collection.
33: Turn on all the options.